TLDR
- Measure the flat label panel, not the full height of the container.
- For a round bottle, calculate circumference by multiplying the diameter by 3.1416.
- Leave a small gap between the ends of a wraparound label unless you intentionally want an overlap.
- Test the proposed label size with plain paper before ordering.
- Tapered bottles, cups, and jars may require a curved label instead of a standard rectangle.
A label can be beautifully designed and still fail because it is one-eighth of an inch too tall. It wrinkles near the bottle shoulder, lifts along the base, or ends up slightly crooked because the two ends are almost impossible to align.
Learning how to measure a bottle for a label prevents most of these problems. You do not need specialized equipment. A ruler, flexible measuring tape, piece of paper, and the actual container are usually enough.
But there is one important rule: measure the container you will actually use. Do not rely only on the listed capacity, such as 8 ounces, 12 ounces, or 16 ounces. Two bottles with the same capacity can have different diameters, shoulders, label panels, and curves. Read.
Start With the Container, Not the Label Design
It is tempting to design a label first and make it fit later. That order creates unnecessary problems.
Your container determines the maximum label dimensions. It also affects the label shape, material, adhesive, and application method. Before opening your design software, place the container in front of you and inspect its surface.
Look for the label panel. This is the smooth or relatively flat area where a label can sit without reaching into a shoulder, rim, ridge, seam, or curved base. On many bottles and jars, the usable label area is the straight section between the upper shoulder and the lower curve.
Labels that extend too far into curved areas are more likely to wrinkle, lift, or form small channels along the edge. Keeping the label inside the straight section usually makes application easier and produces a cleaner result.
Measure the container after you have selected the final packaging supplier. A sample bottle from another manufacturer may look identical but differ enough to change the fit.
Choose a Label Layout Before Measuring
The correct measurements depend on how much of the container you want to cover. There are several common layouts.
| Label Layout | Best For | What to Measure |
|---|---|---|
| Front label | Simple branding and short product names | Width and height of the front label panel |
| Front-and-back labels | Products with ingredients, directions, or detailed information | Separate flat areas on the front and back |
| Wraparound label | Bottles with a long, straight cylindrical body | Label height and container circumference |
| Lid label | Jars, tins, and small containers | Diameter of the flat lid surface |
| Neck or seal label | Tamper seals and decorative closures | Width around the neck and distance across the closure |
| Tapered label | Cups, jars, candles, and bottles that narrow or widen | Top circumference, bottom circumference, and label height |
A front label leaves more of the container visible. It also tends to be easier to apply by hand.
A front-and-back system gives you more control over the design. The front can focus on the logo and product name, while the back holds ingredients, directions, warnings, contact information, or a barcode.
A wraparound label provides the most printable space, but it requires more accurate measuring. Small errors become noticeable when the ends meet.
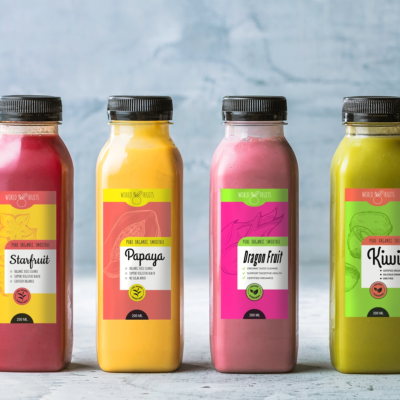
CustomLabelCo offers custom bottle labels in different shapes and sizes, so you are not limited to forcing every design into the same standard rectangle.
How to Measure a Bottle for a Label in Seven Steps
1. Get the Actual Production Container
Use the exact bottle, jar, tube, or container that will be used for the finished product.
Fill it if the container changes shape when full. Some thin plastic bottles flex or expand slightly. Also add the cap, pump, lid, or closure so you can see the complete package.
2. Find the Flattest Label Area
Place a ruler or index card vertically against the side of the container.
Identify where the straight surface begins and ends. Do not include the curved shoulder near the neck or the rounded section near the base.
Some containers include molded seams, raised measurements, grip textures, or recessed panels. Decide whether the label will sit over these features. In most cases, a smooth area will provide better contact.
3. Measure the Available Label Height
Measure vertically from the top of the usable label panel to the bottom.
Do not automatically use that full measurement as the label height. Leave a little room at the top and bottom so the label does not drift into a curved section during application.
For example, suppose the straight label panel is 3 inches tall. A 2.875-inch label may be easier to apply than a full 3-inch label. That leaves a total of one-eighth inch of clearance, or roughly one-sixteenth inch at each edge.
The exact amount of clearance depends on the bottle shape and how accurately the labels will be applied. Hand application usually benefits from a little extra breathing room.
4. Measure the Label Width
For a front or back label, measure the width of the flat area where the label will sit.
For a round wraparound label, measure the circumference. The easiest method is to wrap a flexible measuring tape around the container at the center of the proposed label area.
No flexible tape? Wrap a strip of paper around the bottle. Mark where the paper meets, lay it flat, and measure from the end to the mark.
You can also calculate circumference from the bottle diameter:
Circumference = Diameter × 3.1416
A bottle with a diameter of 2.5 inches has a circumference of approximately:
2.5 × 3.1416 = 7.854 inches
That is the total distance around the bottle. It is not necessarily the final label width.
5. Decide Between a Gap and an Overlap
A wraparound label can end with a gap, meet edge to edge, or overlap itself.
For most labels applied by hand, a small gap is the most forgiving choice. Subtract approximately one-eighth to one-quarter inch from the container circumference.
Using the 7.854-inch example:
- A one-eighth-inch gap produces a label about 7.729 inches wide.
- A one-quarter-inch gap produces a label about 7.604 inches wide.
You can round these measurements to a practical production size after testing.
Trying to make the ends meet perfectly leaves little room for application error. Even a small angle at the beginning of the application can cause the opposite end to finish higher or lower.
An overlap can help on small cylindrical containers or when a continuous wrap is important. In that case, add enough width to create a deliberate overlap. Around one-quarter inch is a useful starting point, but the correct amount depends on the material, adhesive, container, and design.
Do not place important text, a barcode, or a fine pattern directly across the seam. Even a well-applied label can shift slightly.
6. Make a Paper Test Label
Create a rectangle using the proposed label dimensions. Print it on plain paper at 100% or “Actual Size.”
Do not use “Fit to Page.” Printer scaling can change the dimensions enough to make the test unreliable.
Cut out the paper label and wrap it around the container. Check:
- Does it stay within the straight label panel?
- Is the gap or overlap where you expected?
- Does it sit flat?
- Does it cover any molded seams or textures?
- Is there enough space for readable text?
- Does the front panel face the correct direction?
- Will customers be able to find important information?
Tape the paper template in place and look at it from several angles. Photograph it as you would photograph the finished product. A label may technically fit while still looking too large, too small, or poorly balanced.
7. Test More Than One Container
Measure several containers from the production batch when possible. Packaging can have small dimensional variations.
Your label should fit the normal range, not only the first bottle you picked up. This matters most when the design uses nearly all the available space.
Once the paper template works across multiple containers, you have a much safer label size to use for the artwork and proof.
How to Measure Square and Rectangular Bottles
Square bottles are usually easier to measure because they provide distinct flat panels.
Measure only the face where the label will be applied. Record the available width and height, then subtract a small amount of clearance from both dimensions.
Do not allow the label to run directly into a rounded corner unless that is an intentional part of the design. A label that crosses a corner may lift because the material is trying to return to a flat shape.
A front-and-back layout often works especially well on square bottles. It provides two clean panels and avoids forcing a long label around several corners.
Also inspect the bottom of the bottle. Some square containers have sides that taper inward near the base even though the center looks straight.
How to Measure Jars
For a body label, use the same process as a cylindrical bottle. Measure the straight height and the circumference of the jar.
For a lid label, measure the flat top surface rather than the full outside diameter. Many lids have a curved rim, raised edge, or recessed center. The label should normally sit inside that boundary.
A jar can also use several coordinated labels:
- A main product label on the front
- An information label on the back
- A round logo label on the lid
- A narrow tamper seal connecting the lid to the jar
This can be cleaner than placing every piece of information on one oversized wraparound label.
Tapered Containers Need Extra Attention
A tapered container becomes narrower or wider from top to bottom. Common examples include drink cups, cosmetic jars, candle vessels, yogurt containers, and some sauce bottles.
A standard rectangular label may appear to fit while flat. But when wrapped around a tapered surface, the top and bottom edges travel different distances. The label can wrinkle, form a diagonal seam, or rise on one side.
A quick way to check for taper is to hold a ruler or index card against the side. If the edge of the container moves away from the straightedge, the surface is tapered.
A custom tapered label generally requires several measurements:
- Circumference at the top of the label area
- Circumference at the bottom of the label area
- Vertical label height
- Desired wrap coverage
- Corner radius, when applicable
These measurements are used to create a curved label shape that follows the container. A tapered label should also be printed on paper at actual size and tested before production.
For a mild taper, a smaller front label may be simpler than a full wrap. The label avoids the most angled parts of the container and may not require a custom curved cut.
How Much of the Container Should the Label Cover?
A larger label is not automatically better.
More coverage gives you additional room for branding and product information. But it can also hide an attractive container, make a small product feel crowded, or increase the chance that the label reaches a difficult curve.
Consider what the customer needs to see first.
A simple product may only need a product name, flavor, weight, and logo on the front. Supporting information can move to a back label.
A more technical product may benefit from a wraparound label with organized sections. But the design still needs margins and readable type. Filling every available inch usually makes the label harder to scan.
Clear containers introduce another choice. A smaller label can show the product inside, while a wraparound label provides more privacy and printable space.
Match the Label Material to the Container
Correct dimensions will not fix an unsuitable material.
Before ordering, consider:
- Glass, plastic, metal, paperboard, or another surface
- Smooth, textured, frosted, or coated finishes
- Refrigeration and condensation
- Oils, soaps, or cosmetics that may contact the label
- Indoor or outdoor use
- Hand application or repeated production
- Removable or permanent adhesive needs
Test the label on the real container under normal conditions. A beverage label should be tested cold and with condensation. A bath product should be tested around moisture and normal handling. An oily product should be tested for edge lifting or staining.
And do not test only for a few minutes. Give the adhesive time to form a bond before deciding whether the material works.
Common Bottle Label Measuring Mistakes
Measuring the Full Bottle Height
The cap, neck, shoulder, and base are not usually part of the usable label panel. Measure only the section where the label can sit flat.
Assuming All Bottles of One Capacity Are the Same
A 12-ounce bottle is a volume, not a shape. Different suppliers can use very different dimensions.
Ordering Before Receiving the Container
A specification sheet is useful, but it does not replace a physical test. Have the production container in hand before finalizing the label size.
Designing Edge to Edge
Using every fraction of an inch leaves no room for normal application variation. A slightly smaller label is often easier to place and looks more intentional.
Ignoring the Seam
Plan where the ends of a wraparound label will meet. Keep barcodes, small text, and important graphics away from that area.
Missing a Slight Taper
A taper does not need to be dramatic to affect a long wraparound label. Check with a straightedge before assuming the surface is cylindrical.
Skipping the Paper Template
A digital mockup cannot show exactly how a flat rectangle will behave on a physical container. The paper test takes a few minutes and can prevent an expensive reorder.
Bottle Label Measurement Checklist
Before approving your final size, confirm that you have:
- The actual production container
- The finished cap, lid, pump, or closure
- The height of the straight label panel
- The width of the front or back panel
- The circumference for a wraparound label
- A planned gap or overlap
- A seam location
- A paper template printed at actual size
- Enough room for readable product information
- A test on more than one container
- A material test under realistic conditions
Once the size and design are settled, custom roll labels can make repeated application easier for ongoing production. Smaller testing quantities may make more sense while the packaging is still being refined.
Final Thoughts
The safest way to measure a bottle for a label is simple: find the flat label panel, calculate the usable width, leave a little clearance, and test the result with paper.
Do not let a standard bottle capacity or a computer mockup make the decision for you. The physical container gets the final vote.
Measure first. Test second. Then order.
Frequently Asked Questions
How Much Smaller Should a Wraparound Label Be Than the Bottle Circumference?
For a visible gap, subtract approximately one-eighth to one-quarter inch from the measured circumference as a starting point. Test the exact size on the actual container before ordering.
Should a Bottle Label Overlap?
It can, but the overlap should be intentional. An overlap may help a label remain secure on a small round container, although it creates a visible seam and can interfere with detailed artwork. Add approximately one-quarter inch as an initial test, then adjust as needed.
How Do I Measure a Bottle Without Flexible Measuring Tape?
Wrap a strip of paper around the bottle and mark where the paper meets. Lay the strip flat and measure it with a ruler. This gives you the circumference at that point on the bottle.
Can I Use a Rectangular Label on a Tapered Bottle?
A small front label may work. A long wraparound rectangle often wrinkles or angles because the top and bottom of the container have different circumferences. Full wraps on tapered containers usually need a curved dieline.
Should I Choose the Bottle or the Label First?
Choose the bottle first. Once the container is confirmed, you can measure the available surface and create a label that fits it. Designing around an unconfirmed container increases the risk of resizing the artwork or reordering labels.
References
- Avery: How to Choose the Right Label Size for Your Product
- Consolidated Label: How to Measure a Bottle and Calculate Label Size
- OnlineLabels: Tapered Label Generator and Measurement Guide
Intent Sentence
This post helps small businesses, product makers, and packaging designers choose the correct bottle label size by explaining how to measure straight, round, square, and tapered containers, so they can order labels that apply cleanly and fit the first time.
SEO Pack
SEO Focus Keyphrase:
how to measure a bottle for a label
SEO Title:
How to Measure a Bottle for a Label Correctly
Meta Description:
Learn how to measure a bottle for a label, calculate wrap width, choose a clean gap or overlap, and test jars and tapered containers before ordering.
Slug:
measure-bottle-jar-custom-labels
Excerpt:
Learn how to measure bottles, jars, and tapered containers for custom labels. Calculate wrap width, plan the seam, and test the fit before ordering.
SEO Tags:
bottle label size, custom bottle labels, how to measure a bottle, jar label size, wraparound labels, product packaging, custom labels